
A DIY ring light can be just what you need to enjoy better photos or clearer videos. Whether it’s about taking care of business or simply an interest in art, ring lights can truly make a difference.
Ring lights are used by professional photographers and cameramen because they can significantly increase the clarity and quality of an image.
Ring lights are especially useful indoors, where light is often problematic, helping improve visibility and details of an image.
If you want to upgrade your photos and videos, a ring light is just what you need. But because the budget is usually a challenge, making your cheap ring lights is definitely something you need to consider.
Bear in mind that a clear product picture or video can boost your business immediately. Visual details are most appreciated by potential customers and will increase your sales.
What is a Ring Light?
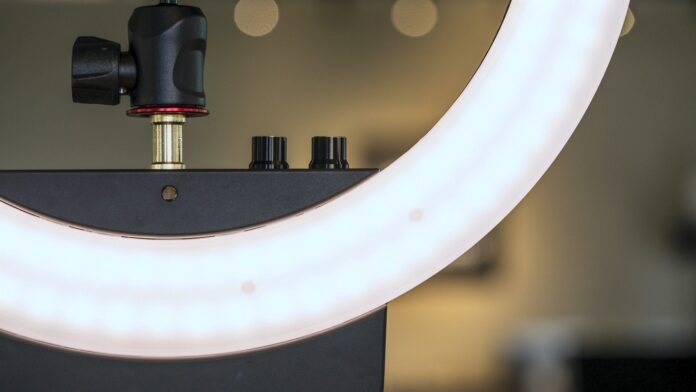
A ring light is pretty much what its name suggests. More precisely, it is a lighting tool shaped like a ring. So, yes, it will have a hollow area in the middle.
It is highly appreciated because it can provide uniform light by using one single source. So, makeup artists, hairstylists, photographers, video makers, and others, prefer using a ring light.
If you have an online store, for example, a ring light can help you obtain better and clearer photos of your products. This way, customers can have a better view of the product’s details.
These days, images can make a difference between a successful business and an unprofitable business.
To capture video or images need a better quality device.
DIY Ring Light – How To Make It: A Step-by-Step Guide
Making your DIY right light at home is actually very easy. You can enjoy the light it can provide without spending too much money.
Also, the making process is very quick and convenient so that anyone can do it.
You have several ways of obtaining the desired ring light for your activity, business, or hobby.
In the following lines, you will find out how to make your own DIY ring light from scratch, with a very low budget.
01. Method Using White Plastic Drain Hose
A very simple DIY ring light can be made out of a white plastic drain hose, an LED stripe that provides white light, some white gaff tape, and scotch tape, if needed.
These are items that can be found in almost any home improvement store and cost very little.
The length of the drain hose and LED stripe should be determined by the size of your future ring light.
So, first, determine the size of the ring light by drawing a circle and then measure the circle unfolded.
Or you can simply create a ring with the drain hose while at the store, deciding how large to make it on the spot.
Start by folding the LED stripe, so that both sides of the stripe will feature lights. This means to fold it in half, all over its length.
Ideally, you should choose an LED stripe with an adhesive back. If you can’t find any, you can use scotch tape to fix the stripe as presented earlier.
Introduce the folded LED stripe in the plastic drain hose. You must make sure the LED stripe has the same length as the drain hose, so you won’t end up with dark spots on your ring light.
Fix the LED stripe inside the drain hose with the help of white tape. Then shape the drain hose in the form of a circle and seal the ends together with white gaff tape.
Bear in mind that you will have to allow the LED stripe’s power cable to hang on the outside, so you can plug in the light.
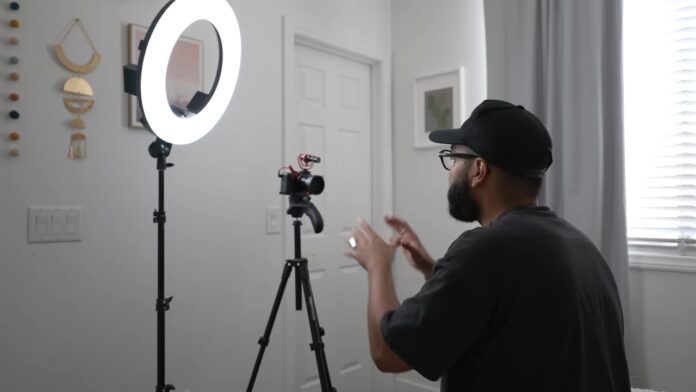
Once the DIY is done, you can hang it anywhere you need and take amazing photos with its help.
02. Method Using Cardboard
You can also make a DIY ring light by using cardboard, 5 meters of RGB LED strip kit, a clamp, a measuring device, a pencil, a pair of scissors, and adhesive or tape, if the case.
It is worth mentioning that you can also use MDF instead of cardboard. But, in order to make the frame, you will need a tool that can help you cut the MDF. So, it is up to you.
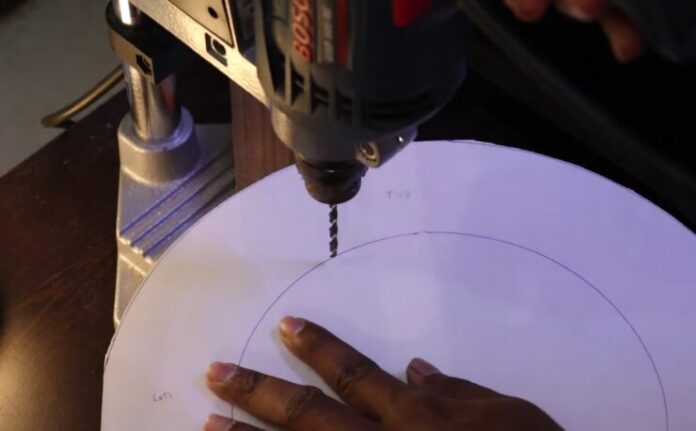
Start by making the frame of your DIY ring light. You need to start by drawing the outline of the frame on the chosen material.
For this example, we will use cardboard. Ideally, you should choose a thicker type of cardboard.
Use a plate, with a length of 10 inches, as a support for drawing the contour. You can use any other round object to make this part happen.
Position the plate on the cardboard, hold it steady with one hand, and draw the outline with the other hand.
In the center of the resulting circle, you should draw a 4.5-inch circle. This will be cut out and will represent the whole of your DIY ring light.
Of course, you can make a circle of any size you desire. Just make sure to have sufficient LED strips to cover the entire surface.
Next steps
Use a cutter or scissors to cut the cardboard ring. Respect the outline you drew with the pencil earlier. Do the same with the inner circle that will represent the whole.
You can leave the cardboard this way or you can paint it. A spray of your chosen color can make it look better. Just perform the spraying parts outdoors. For this, you will need good weather.
On the finished circle frame, it’s time to install the LED lights. As you can tell, it can be quite tricky to bend the LED strip, due to its size. Thus, you will have to cut the strip in smaller fragments, which can be positioned easier on the frame.
First, measure the frame to determine the ideal size of the LED strip. Do your best to cover the frame as much as possible with LED strips. At the same time, try to be effective.
You’ll have to solder the fragments of the strip in the end. So, try not to have fragments of different sizes or fragments that are too small.
Important tip: Always cut the LED strip along the marker found near the copper connections. If you do otherwise, the LED strips won’t work.
If the LED strip has a sticky back, it will stick to the frame on its own. If not, you’ll have to use an adhesive or tape to fix the strips to the frame. Implicit the size of the strips should allow this to happen.
You will see the copper connections as orange stripes along the LED stripe. A fine black line will be visible in the middle of these copper connections. This is where you are allowed to cut.
Because you will have to solder all the LED strip fragments, positioning their ends close to one another is recommended.
This way, your DIY ring light will look neat and will provide even light. So, be careful of how you align all the LED fragments.
Soldering is very easy, even if you have never done it before. You will have to match the connectors of a LED strip with the same connectors on the next LED strip, and so on.
So, solder the “+” connector of strip 1 with the “+” connector of strip 2. Or solder the connector G of strip 1 with the G connector of strip 2. You need to do this with all 4 connectors on each end of all the strips.
Finally, test and enjoy your new DIY ring light for your projects.
Material
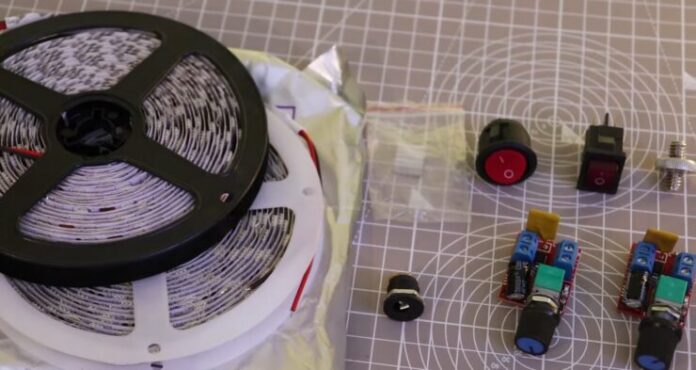
The materials you will need are very cheap and can be easily found in stores. They each cost a few dollars, so the expenses will be low. LED strips or strip kits are a must.
The LED lights will provide the light you need for your lighting tool. Then you will need a type of material for the frame.
Whether it’s a plastic drain tube, cardboard, MDF or anything else, it’s important to be able to stick the LED strips on it.
Most LED strips have an adhesive back, so glue is not needed. However, you may need tape, which is also cheap.
A cutter, scissors, or pencil are items that every household has. If you want to solder the LED strips, you will need additional materials.
But, don’t worry, as they are not expensive.
Time to Make the Project
Depending on your skills and chosen method, making a DIY ring light can vary. It can take from roughly an hour to several hours. This usually happens if you need to cut MDF and solder the LED pieces together.
FAQ
What is a ring light good for?
A ring light can be used for photography, video making, makeup sessions, or better lighting. Positioned in the desired spot, a ring light will offer bright and uniform light.
Ring lights are particularly useful for creating even, flattering lighting that helps to reduce shadows and highlights facial features. This makes them popular among beauty influencers, makeup artists, and photographers who want to create high-quality images or videos with a professional look.
In addition to their use in photography and videography, ring lights are also used in other settings where even, consistent lighting is important. For example, they can be used in medical or dental settings to provide clear lighting during procedures, or in art studios to provide even lighting for painting or drawing.
How much do ring lights cost?
The price of a ring light can vary, depending on the size and features it offers. You can find ring lights ranging between $60 and $120.
But, if you’re on a budget, making a ring light on your own can save a lot of money. Anyone can do it with a handful of materials and a bit of time.
What kind of light color is provided by a ring light?
The light provided by a ring light depends on the used LED strips. So, pay attention when purchasing the LED strips.
If you want white light, choose LED strips that offer bright light. You can also enjoy colored light if you choose LEDs that can be lit in various colors.
How much DIY ring light cost?
You can easily make the right light with materials that cost less than $20 altogether. You can go up to $30 or more if you want to use special materials.
Still, it is much cheaper to make one than to buy a ring light. A store-bought ring light can go up to $100, depending on size and provided features.
What does a ring light actually do?
A ring light will provide a uniform beam of white light. It is capable of lighting a room or area better than a regular light bulb, due to its shape.
The circular design of the ring light helps to reduce shadows and create a flattering, even lighting effect on the subject. This is achieved by placing the camera or subject in the center of the ring light, which surrounds the subject with light from all directions. This can help to highlight facial features, reduce blemishes, and create a more professional-looking image or video.
Ring lights are commonly used in a variety of settings, including portrait photography, beauty tutorials, video conferencing, and more. They are especially popular among social media influencers, makeup artists, and photographers who require high-quality lighting to produce their work.
Why should use ring light for photography
Photos are significantly impacted by the environment’s light. Sometimes, the flashlight of a camera is not sufficient or adequate for a quality photo. An LED ring light can provide uniform light that will provide the ideal photo.
Whether you need to photograph people or items, a ring light will deliver exceptional results. All professional photo studios have ring lights.
If you have a small business or a hobby, opting for a DIY ring light can help out. You’ll have high-quality photos to use while staying on budget.
Why do YouTubers use ring lights for streaming?
Ring lights are ideal for videos as well. Just like in the case of photos, videos need adequate light to be pleasant and clear. Nobody watches a video that is blurry or dark.
So, to be successful on YouTube, a clear and bright video is a must. This is the reason YouTubers use this type of lighting tool. When filming in front of a ring light, the face of a person can be clearly seen.
All details in the video will be clear and visible. This is the best recipe for a highly appreciated YouTube video.
What size ring light is perfect?
The size of the ring light depends on the way you will use it. If you need a ring light to photograph small items, a small right light will do.
If you are a photographer or makeup artist, you will need a larger right light. Ideally, the ring light should have a tripod and goose-neck, for easy and convenient use.
Can you use a ring light for makeup?
Yes, a ring light can be a great tool for applying makeup, particularly for those who do makeup tutorials or need to apply makeup in low-light settings.
The even and consistent lighting provided by a ring light can help to eliminate shadows and create a more natural-looking makeup application. This can be particularly helpful for highlighting specific facial features, such as the eyes or cheekbones, or for creating a more even skin tone.
Many makeup artists and beauty influencers use ring lights to create high-quality images and videos showcasing their work. The circular design of the ring light allows the light to wrap around the subject, providing a soft and even illumination that is ideal for makeup application.
Verdict
A ring light is a very versatile lighting tool. It can be used to make hobbies more enjoyable or boost businesses. These days, many people have online stores, for instance.
Ring lights can be used, in this case, to provide better photos of sold items. But they can also be used for photography and video making in general.
Such light will enhance details, improve colors, and boost image clarity. A ring light may not come cheap, but you can easily make one on your own.
Materials are affordable and the process is quite simple. You just need a bit of time and patience.
")

