What is the three-point system with respect to lighting? The three-point lighting system is important to learn if you want to take still photographs indoors. These days, most cameras and cell phones are very forgiving. That is if you take candid photos outside.
When you don’t have the right lighting, your indoor photos will still turn out as poorly lit. Even if you have the best camera. This is especially true if you are trying to photograph a portrait of someone. If so, this article will explain the three-point lighting system. This is because the three-point lighting strategy will greatly improve your indoor photography. And if you are an aspiring photographer, this is something you need to study.
Why is 3-point lighting important?
Three-point lighting is important because it boosts the quality of your photographs. You don’t want to start out as an amateur photographer who misses indoor shots. If you miss an important moment in anyone’s life, you won’t be hired again. A professional lighting package will help you capture the moment indoors.
What is a 3 Point lighting kit?
What are 3 point lights and where do you get them? You can just order them online. They cost anywhere from $50 to $300. Not that much if you are an aspiring photographer. And as you might expect – they come with the stands that you will need to set them up for a photoshoot. Most packages also come with the equipment bags you need to transport the lights and stands.
What is The Three-Point System With Respect to Lighting?
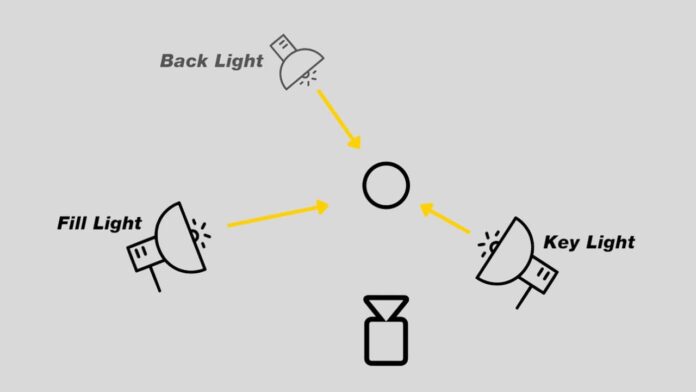
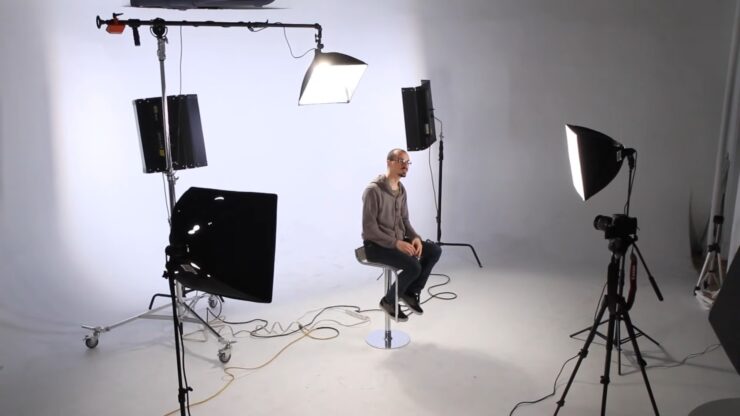 The three-point lighting technique is the standard for indoor photography. It includes three lighting elements. This is the key light, the fill light, and the backlight.
01. The key light comes first
This is also called the main light. The key light is the most important because it casts light and shadow for dramatic effect. But you don’t want too much shadow if you are trying to take a flattering photograph. That’s where the fill light comes in. https://www.youtube.com/watch?v=YzvHEBm6VZs
02. The fill light is set up opposite from the key light
Which means to the right or left. The fill light is also usually softer light. This light is used to fill in the shadows cast by the key light. Then, there is the backlight.
03. The backlight – true to its name – is placed behind the subject
Sometimes it’s called the rim light. And by placing a backlight behind your subject, you create even more nuances in your photography. Unlike the key or fill light, the backlight is not direct lighting. It provides subtle highlights from behind your subject. It also provides a 3-dimensional look to your photography. This is because it separates your subject from the background.
The benefits of using 3-point light in photography
First of all, your subject will look much better. It doesn’t matter whether you are taking indoor selfies, a family portrait, or working on an art project. Three-point lighting will improve any picture you take inside.
But let’s focus on people first
Photography of people indoors is usually what 3-point light is used for. This is because 3-point lighting makes them look better. Three-point lighting is sort of like natural sunlight.
And if you want to be a professional photographer, you will have to learn about indoor lighting. So one of the main benefits of using the 3-point lighting system is that people will love the end result of their photographs. Why not? You are showing them in their best light. But there are a few other benefits.
You don’t have to Photoshop so much
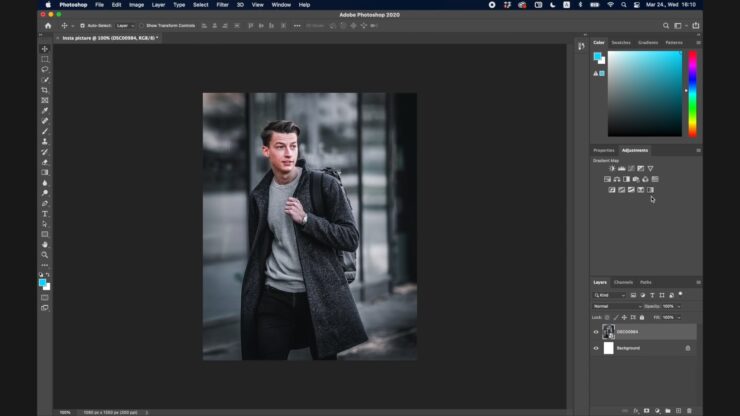 Most people like to edit their photos if they don’t like them. However, if you have the right lighting system, you don’t have to worry about that. People always want to look their best, particularly when it comes to a permanent photo. One that will be posted on the internet.
People want to look good naturally in photographs
And who knows? You might be taking a photograph for someone who wants to get a date online. Or a family reunion. And everyone who goes on dating apps knows an altered image when they see one. Families also want to see everyone looking their best. So if you get the lighting right in the first place, people look more natural.
When you learn the 3-point system, you can create life-lasting memories
We all remember life in a more sentimental way than how it happened. As a photographer, when you capture indoor portraits – you become more than an artist. You become a historian. If your photographs are that good, you can inspire people around the globe.
Here are a few more things to consider about the three-point lighting system.
a) You might also like to sell items online. The three-point lighting system works for this a well. Because whatever you sell online, it will need to be lit well. Otherwise, people won’t buy it. So it is a good idea to light your items well. From the front first. This is the key light. Then from the side. This is the fill light.
But to take the best photo, you also have to use a backlight. This is so people will notice all of the rich detail of whatever you are selling. b) So by using the three different lights, you will make much more money selling your items online. c) As a seller, it is much more important to have the best photos online. https://www.youtube.com/watch?v=EBGuQZo0g94
Problems of a 3-Point Lighting System
The 3-Point system only works for certain kinds of shots. But not for others.
Here’s the problem
We’ve talked about how the three-point system mimics outdoor sunlight. But as a photographer, this might not be what you are going for. For example, if you have a home with natural light streaming in from the windows, you might not need it. There are a few other problems.
a) The 3-point lighting is not for candid photos.
If you are taking pictures of active people, they won’t stay put long enough for 3-point lighting to work. Three-point lighting is really only useful for still shots. Even if you want to photograph your pet inside, they will have to sit still under the lighting.
Or if you want to take photos at a dinner party, everyone will have to remain under the lighting as well. Most people and pets do not like this kind of constraint. Even fashion models get tired of being under the lights. Which brings us to our next point.
b) 3-point lighting can be hot.
The lights needed for three-point lighting can get hot. They are also restrictive for your subject because they always need to be in the light to get the right shot.
c) 3-point lighting can be bright.
These lights can be also very bright. Think about it this way. Remember how we told you three-point lights mimic the brightness of the sun? No one wants to be under bright lights like that for any amount of time. As a photographer, you will have to have some patience with anyone you are taking indoor pictures of.
So why should you use 3-point lighting at all?
We’ve gone over the pros and cons, but there is a history here. Most photographers rely on this technique (or some variation) when they shoot indoors. And if you are a photographer, at some point, you will be asked to do some indoor photography.
And there are indoor photography setbacks.
It could be a rainy day. Or it could be dark in someone’s house. But more than anything, people want clear photos that show them in their best light. Even if there is no natural lighting available. As a photographer, you have to have a contingency plan. One that will capture the best indoor photograph possible.
In the practice of photographers, when there is no natural light, they have to recreate it. That’s the value of 3-point lighting. So let’s move on to creating natural light in an indoor environment where there is none.
3-Point Lighting
The lighting direction of your photoshoots will make all of the difference. To further explain, here are a few more detailed descriptions on how to complete a professional photoshoot indoors:
01. The Key Light
The key light will be shining directly into the faces of your subjects. It will also be the most illuminating light in your photoshoot. So to set up a key light, you will first have to pose the people who will be in your photograph.
This is to light them correctly. You will then have to shine the key directly on them. This is after you plug it in and set it up on its stand. As a photographer, you will have to keep adjusting the main light until everyone looks the most appealing. What’s important to remember is that you can soften the features of everyone with the fill light. After they are staged.
02. The Fill Light
As a photographer, you may take a few initial shots with the key light that people might not like. But now it’s time to set up your fill light. The fill light (as we have talked about) saves the day.
When you position it correctly, the fill light softens everyone’s features. And as most photography is digital now, you can make a few adjustments without wasting film. If all else fails, there is the backlight. But be careful. Again, most regular people don’t like a lot of lighting. Backlighting is sort of a last resort. So now let’s talk about backlighting.
03. The Back Light
Some people like the backlight and some do not. But when it comes to backlighting – it really depends on the subject. This is because sometimes backlighting works in favor of the photographer. Or it can work in favor of the subject. It all depends. But setting up backlighting is easy. All you have to do is point the third light toward the back of your subject.
04. Bring extension cords
This is a minor detail. But the outlets in someone’s home are not always in the right place for your 3-point lighting system. Just remember one thing. When it comes to a lighting system, there is always more to learn. Which brings us to the next level. A four-point lighting system for more advanced photography.
So what is a Four-Point Lighting System?
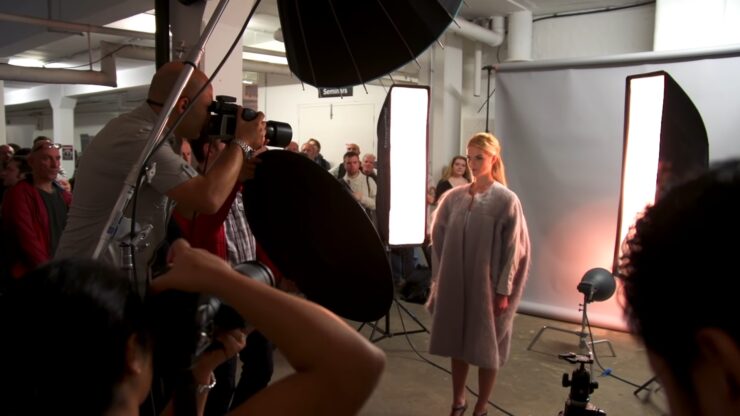 A four-point lighting system simply adds another backlight to the photo shoot. Although, with a four-point system, you have the backlight, but then a light that is called a background light. This additional light specifically illuminates the background. It is used so that the walls or backdrop can be seen as well. This can be important to photographers who are trying to capture more than the subject who may no longer be the entire focus.
3-point vs 4-point lighting
It’s very simple. Three-point lighting is more for projects that don’t require the background to be in focus. If you want the background and the subject to be equal in your photograph, then you can go for 4-point lighting. This would be for a very specific situation. Like if you wanted to photograph an artist standing in front of their sculpture. Although, you shouldn’t dive into 4-point lighting until you master 3-point.
How to Use the 3-Point System Effectively in Photography
- The goal as an indoor photographer is to separate your subject from an indoor background. Indoor backgrounds can tend to make photographs look flat.
- Set up your camera and take a few test shots. This will help you establish the camera-to-subject axis. The camera subject axis is an imaginary line you visualize. This line helps you establish where to place the lighting.
- Place the key light first. It goes on the right or left side of the axis line. It is the brightest light. So you may have to reposition it to get the right effect. The closer you put it, the better the lighting effect.
- Next, place the fill light. It goes right on the axis line to soften the shadows on your subject.
- The last step is to place the backlight. Again, it goes behind the subject to separate them from the background. It can be placed far behind to create less shadow. It can also be placed on the side to create a more dramatic effect. This is called a kicker.
Here Are Some Common Misconceptions about the 3-Point Lighting System
- It’s not as hard to learn the set-up for the lights as you might think.
- It’s not expensive to buy a starter lighting kit.
- The lights are not heavy or difficult to move around.
- The 3-point system will not fix every indoor lighting situation.
FAQ’s
Can I find a 3 Point lighting diagram?
It’s hard to visualize the three-point lighting system if you haven’t ever used it. But there are diagrams online that will help you make sense of it. They show you how to point the lights and position them so that you can set them up for the best lighting possible.
What is the purpose of a 3-point lighting system?
The purpose of a 3-point lighting system is to create a visually appealing and balanced image that highlights the subject and adds depth to the image. It can be used in various settings, such as in portrait photography, product photography, and videography.
Do I need expensive equipment to use a 3-point lighting system?
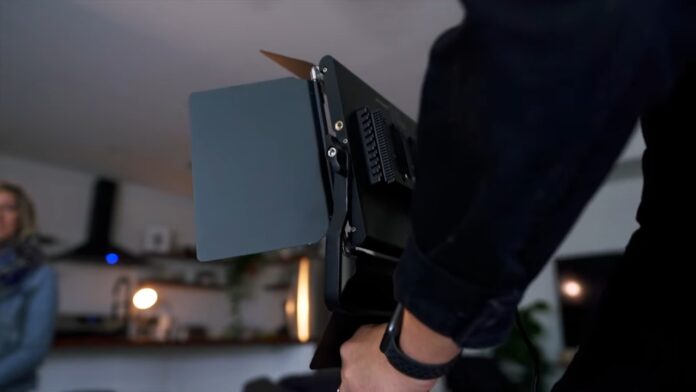 No, expensive equipment is not necessary to use a 3-point lighting system. You can achieve a similar effect using simple lights, such as desk lamps or LED lights. However, professional lighting equipment may provide more control over the intensity and direction of the lights.
Can a 3-point lighting system be used outdoors?
Yes, a 3-point lighting system can be used outdoors. However, it may require more powerful lights or reflectors to compensate for the natural light and create the desired effect.
Is a 3-point lighting system suitable for all types of photography or videography?
A 3-point lighting system can be used in various types of photography and videography, but it may not be suitable for every situation. For example, in some cases, a more dramatic or moody lighting effect may be desired, which may require a different lighting setup.
How do I adjust the lights in a 3-point lighting system?
The lights in a 3-point lighting system can be adjusted by changing their position, intensity, and color temperature. It’s essential to experiment with different settings to achieve the desired effect and ensure that the lighting is balanced and flattering to the subject.
Verdict
Using the three-point system will produce better photos. It’s a standard lighting set-up, this is why many famous photographers and filmmakers use it. So there isn’t any need to depart from it. The 3-point lighting system is really helpful if you are just starting out as a photographer.

