How to splice low voltage landscape lighting wire? Thinking of adding accent lights to your boring yard? If yes, then you can do it all on your own.
You will be amazed at how big of a difference the accent lights can make to illuminate your garden or your yard.
The illumination is stunning, it is great for beauty as it instantly enhances the whole look of your yard, it is great for security and safety purposes and the best thing is that you can use the illuminated yard for social occasions.
What’s better than throwing a dinner party in your beautifully illuminated yard, right? You can even have a small yet private wedding ceremony if you like. The ideas and imaginations are limitless!
What Are the Steps for Splicing Low Voltage Landscape Lighting
Splicing the low voltage landscape lighting can be pretty easy and you can surely do it on your own with the help of a few handy tools.
There are landscape lighting systems available which you can use for landscape lighting but the only problem that you might have is that they are already cut, the length of the already cut wire may not allow you to place the accent lights to desired places.
So, to make sure that the accent lights reach all the desired areas, you have the liberty to splice additional sections of wire. This will help you in adjusting the landscape lighting according to your needs.
DIY Tips for Splicing Low Voltage Landscape Lighting
The following steps need to be followed to splice the low voltage landscape lighting:
Stretching The Existing Wire of Landscape Lighting
The first step is that you have to make sure that the already existing landscape lighting is disconnected from the power source.
Once you do that, then you have to make sure that the whole wire is stretched out.
After stretching out the wire, you need to cut it from the middle.
Stripping Insulation
The next step is prepping the wire for splicing. You have to make sure that the cut ends of the wire are stripped so that the insulation is removed.
Make it certain that each end of the wire that you cut is 1-inch bare. Now, the leads of the wire must be separated, there must be a difference of about 4-6 inches.
Inserting the wire into the circuit
Before you add the additional sections of the wire, make sure that they are cut long enough so that you can place the lights to the desired place.
The wire that you are going to add to the original wire, must be of the same gauge and construction.
Strip the additional wire to 1-inch as well.
Heat-shrinking tube
The fourth step includes the sliding of the heat-shrinking tube.
The new or the additional wire that you are going to add to the original wire must have the heat-shrinking tube on its ends.
Each of the ends must have two of these which means that a total of four heat-shrinking tubes will be needed.
Joining or twisting together the old or new wires
The fifth step includes the twisting of the old and the new wires so that a continuous length is created. Now comes the part where you will have to solder.
Take a soldering iron, and solder at each joint. Heat the wire and then let it flow to the joint. You will have to repeat the soldering until you see that the job is fully done.
Sliding heat-shrinking tube over the joints
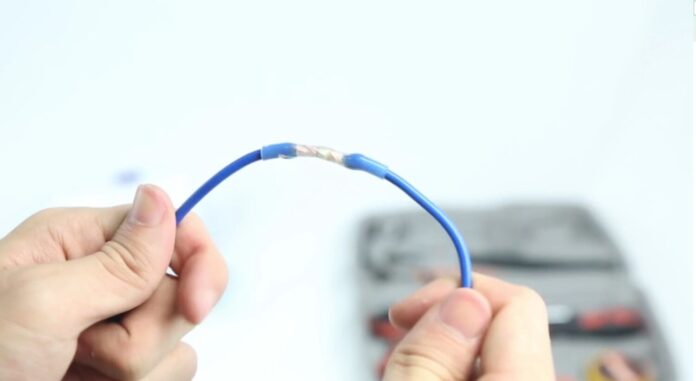
After step 5, you will have to wait until the joints are cool. Once they are cool, you can slide the heat-shrinking tube over the joint.
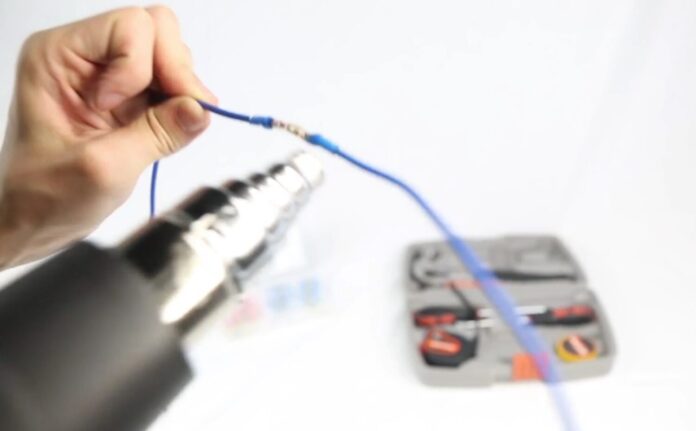
Now, you will need a hairdryer to the rest of the job. Turn on the hairdryer and direct its heat to the heat-shrinking tube, make sure that the tube is tightly adjusted to the joints.
Test operation
At this point, you are ready to plug in the landscape system and test its operation. You can then place the lighting fixtures as needed.
Multiple Wiring Hacks

Can I splice 4 led wires into one connector in landscape lighting?
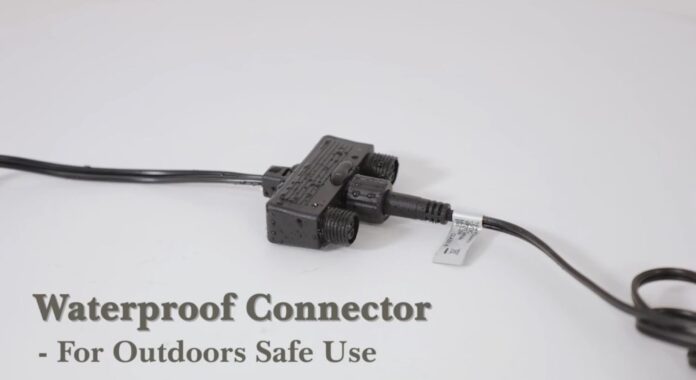
yes, you can, with a proper 4 in-line connector and heater it can be easily done. I hope the below video helps you the most.
Tips
- Make sure that you are properly removing the insulation, if the insulation isn’t properly removed then the connection will not be strong.
- While soldering, you have to keep in mind that you may need to repeat the steps until the joint is fully strong.
- Use the hairdryer on full heat but keep it a little far initially, and then decrease the distance of the heat and the joint as needed.
As directly applying too much heat might lead to a not properly adjusted heat-shrinking tube. Make sure that you are careful and patient during this step.
Dos
- Make sure that the gauge and construction of the additional wire or the new wire are the same as the original wire.
- Always have the wire leads cleaned and straight while making the connection.
- Apply the heat-shrinking tube to protect the joint and the connection.
- To reduce the voltage, and drop, make sure that you are using parallel connections.
Don’ts
- Never use a new wire with a different gauge or construction.
- Do not fray the leads of the wire, it can cause voltage drop and many other issues in the connection.
- Never leave the joints bare, this is a huge safety risk and it will surely cause a lot of damage. Not only will you lose the connection but you may also end up breaking the lights.
- Make sure that you don’t overload the wire connectors.
Installation process
The installation process of the landscape lighting involves quite a few steps, the steps are as follow:
Step 1: Take the landscape lighting fixtures out of the box, you have to thoroughly go through the instruction manual as well at this step.
Step 2: Plan the locations of the lighting fixtures and install them roughly. Don’t put them in permanently, just roughly install them so that you can move them if you feel that there is a need.
Step 3: Now, you have to dig trenches of about 6 inches deep, mark the cable using the color tag, and adjust it as well according to the need.
Step 4: After laying out the rough plan, you are now ready to connect the fixture wires to the home run wires.
Laying out the rough plan helps you know where exactly you are going to put the lights and this also tells you whether you need extra wire of lights or not.
Step 5: Next, the home run wires should be connected to the transformer.
Step 6: Now you have to check that all the lights that you have attached are working. If in case, some of the lights are not working then you can check the wiring and the joints. The joints must be strong enough so that all the lights are working.
Step 7: Mount the transformer when you know that all the lights are properly working. Lastly, you will have to bury the wires.
You surely don’t want them to be seen as it is likely to cause someone to trip, they may be a safety hazard and also, they may not look as great either so its better to just bury them.
What gauge is best for low voltage lighting?
The wires that have a lower number means that they are thicker and since they are thicker, they have the ability to carry power to greater distances without any trouble.
The lower numbered wires are also known to have a greater capacity.
The most common wires for landscape lighting are 10-, 12-, 14- gauge wires. In order to prevent voltage, drop, the most recommend wires are 10- gauge and 12- gauge.
Also, one more thing that you have to keep in mind is that the wires that will be spliced to the already existing landscape lighting must be of the same gauge as of the original wire.
What is the best low voltage landscape lighting?
There are quite a few low voltage landscape lightings but one of the best ones is:
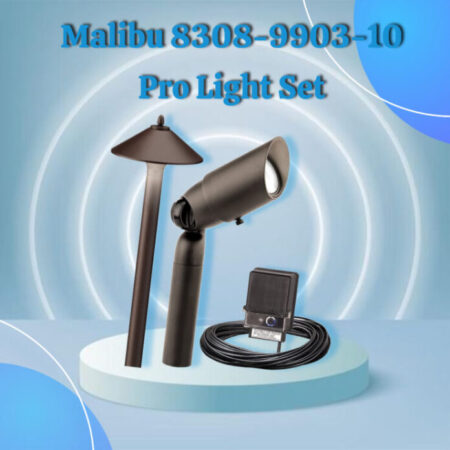
MEIKEE 7W LED Landscape Lights Pathway Lights

There are different systems with a different number of lights, you can get your hands on one which has the most suitable number of lights according to the need of your open space, garden or yard.
Also, you also have the liberty to add additional lights in an already existing system.
How many lights can you put on a low voltage transformer?
To answer this question, it is important to understand that there are two different kinds of transformers.
One is electronic and the other is magnetic, the electronic transformers have a power of 300 watts while the magnetic ones have a power of 1,200 watts.
Make sure that when you are using an electric transformer, the wattage of the lighting fixtures attached to it should be less than or equal to the maximum wattage rating of the transformer.
When it comes to the magnetic transformers then the wattage of the lighting fixtures attached to it should not be more than 80% of the total maximum wattage rating.
FAQ
Does outdoor wire have to be in conduit?
Some of the wires are not necessary to be in conduit and you have the liberty to place them or extend them anywhere you like.
However, there are a few wires which may have different materials, they may need to be in conduit when installed outside to keep them protected.
Again, not all wires have to be enclosed in a conduit. The great thing about the low voltage landscape lighting is that after the installation and after splicing the low voltage additional wires, the wires can be buried.
Since the wires are buried, they are not a risk and they can be taken out once there is a need for taking them out.
In case of a broken connection, you can always go ahead and fix it.
Does polarity matter in low voltage lighting?
Yes, polarity does matter in low voltage lighting. In low voltage lighting systems, the direction of the current flow through the circuit is important because it affects the brightness and color of the light emitted by the bulbs.
The bulbs used in low voltage lighting systems are often designed to operate with a specific polarity, and reversing the polarity can result in reduced light output or even damage to the bulbs or other components of the system.
To ensure proper polarity in a low voltage lighting system, it is important to follow the manufacturer’s instructions for wiring and installation.
This may involve using specific connectors or wiring configurations to ensure that the positive and negative wires are connected correctly.
In addition, it is important to use a voltage meter or other testing equipment to verify the correct polarity before energizing the system.
By following proper wiring and installation procedures and ensuring correct polarity, low voltage lighting systems can operate safely and efficiently.
Can two different wire gauges be mixed?
While it is generally not recommended to mix different wire gauges within a single circuit or connection, there are some situations where it may be permissible or even necessary.
For example, if a particular section of a circuit requires a higher current capacity than the rest of the circuit, it may be necessary to use a thicker gauge wire for that section.
However, it is important to ensure that the wire connections are secure and that the wire gauge used is appropriate for the current load and distance of the circuit.
Mixing wire gauges can potentially cause issues with resistance, voltage drop, and overheating, which can damage the circuit or equipment and create a safety hazard.
In general, it is best to use consistent wire gauges throughout a circuit or connection to ensure reliable performance and safety.
Is all landscape lighting low voltage?
No, all the landscape lighting is not low voltage but in the current times, the low voltage landscape lighting is commonly used and it is because they are safer and you will not have to worry about any incident taking place.
Secondly, the other kinds of landscape lighting can be very costly to install so the people really don’t opt for them.
If we talk about the low voltage landscape lighting then it can be easily said that they are less expensive to install as compared to other landscape lighting.
Verdict
The landscape lighting is a great way of illuminating your garden or yard, you can install the lights on your own by following the instructions on the manual.
However, it is quite possible that the readymade landscape lighting system may not be able to place the lights on all the areas that you desired.
In this case, you can add additional wire and splice it so you can illuminate all the areas that you like.
Splicing can be easy but you have to be careful when following the steps, as you have to make sure that the joints are strong and so is the connection.
Helpful Video:

