
Changing or removing a ceiling light fixture can be a daunting task, especially when there are no visible screws. It might appear as an insurmountable puzzle.
Whether you’re replacing an outdated fixture of this type, making aesthetic upgrades, or performing a home repair, understanding how to tackle a fixture without screws is a crucial skill.
The good news is that this seemingly complex process can be broken down into a few simple steps, making it a manageable DIY task.
In this comprehensive guide, we’ll demystify the process and equip you with all the knowledge you need to safely and effectively remove a ceiling light apparatus sans screws.
Understanding the Different Types of Ceiling Light Fixtures

Before you start, it’s important to understand the type of ceiling light device you’re dealing with. Common types include flush mount, semi-flush mount, recessed, track, and pendant lights.
Flush mounts are directly attached to the ceiling, with the glass or diffuser hiding the attachment mechanism. Semi-flush mounts hang slightly below the ceiling, while pendant ones hang further down on a chain or rod.
Recessed ones are installed into the ceiling, and track lights are mounted on a track system. In some examples, screws are absent or concealed.
For instance, in a flush mount fixture, they may be hidden under a decorative cover, while pendant lights often use a screwless mounting mechanism.
Knowing the type of device you’re dealing with will help you determine the best approach to remove it.
Tools Required for Removing a Ceiling Light Fixture
Every job requires the right tools, and removing a ceiling light apparatus is no exception. The common tools you’ll need include a step ladder, a screwdriver, pliers, and wire cutters.
A non-contact voltage tester can also be useful for safety reasons. The ladder provides height and stability, while the screwdriver will help to remove any hidden nails or pry-off clips.
Pliers will assist in untwisting wire connectors, and wire cutters can safely cut through electrical wires if necessary.
The voltage tester ensures that the power is off before you start working, reducing the risk of electric shock.
Safety Precautions
Safety should always be the top priority when working with electrical fixtures. Before you start, turn off the power at the breaker box or fuse panel to ensure that no current is flowing to the attachment.
Use your voltage tester to double-check that the power is off. Always make sure your ladder is stable and that you have a good grip and balance before you start working.
If you’re not comfortable performing this task, hiring a professional electrician is the safest option.
Step-by-Step Guide to Removing a Ceiling Light Fixture without Screws
- Step 1: Identify the type of device and its attachment mechanism. The type will determine the removal process.
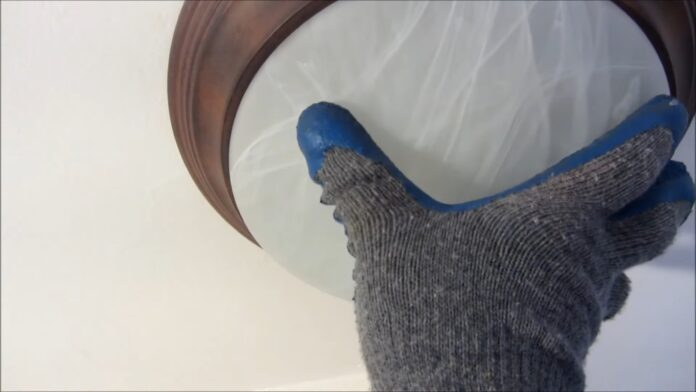
- Step 2: Locate the decorative cover or canopy and remove it. Often, this can be done by twisting it counter-clockwise.
- Step 3: Examine the mounting bracket or plate. This holds the attachment to the ceiling and will usually have screws or clips that need to be removed.
- Step 4: Loosen the mounting one or clips, if present. This can typically be done with a screwdriver or by hand.
- Step 5: Disconnect the wiring from the fixture. Use your pliers to untwist the wire connectors.
- Step 6: Carefully lower it and detach it completely. Always hold the fixture securely to prevent it from falling.
Dealing with Non-Removable Parts
In some cases, components of the fixture may be non-removable. This is common in older homes or with certain designs.
If this is the case, consider covering the non-removable part with paint or a decorative element that matches your new device.
If that’s not an option, replacing the entire ceiling box may be necessary, which should typically be done by a professional.
Troubleshooting Tips
Encountering problems during the removal process is normal. If they are stuck, apply a penetrating oil and wait a few minutes before trying again.
If clips won’t come off, try using a flathead screwdriver to pry them loose.
For tangled wires, a pair of wire cutters and a wire stripper can help you get things under control. Always remember, safety is paramount.
Installing a New Ceiling Light Fixture
Once the old one is removed, you’re ready to install a new one. Always follow the manufacturer’s instructions, as each one is unique.
In general, you’ll first secure the mounting bracket, connect the wiring, and then attach the new fixture. Make sure the device is securely in place before restoring power.
Safety Checks and Final Steps
After installation, always double-check your work. Make sure all connections are secure and that the fixture is mounted properly.
Finally, restore power and test your new attachment to ensure it’s working correctly.
Maintenance and Cleaning Tips

To keep your new device looking its best, regular maintenance and cleaning are key. Always follow the manufacturer’s recommendations for cleaning.
Generally, dusting the fixture regularly and occasionally cleaning it with a suitable cleaner can keep it in top shape.
When to Seek Professional Help
While many people can handle basic fixture changes, there are times when it’s best to call a professional. If you encounter complex wiring, are unsure about the removal process, or don’t feel comfortable doing the task, don’t hesitate to hire a pro.
After all, safety and quality workmanship are paramount when dealing with electrical ones.
Frequently Asked Questions (FAQ)

1. What types of ceiling light fixtures may not have visible screws?
Flush mount apparats often hide them under decorative covers, while pendant ones may use screwless mounting mechanisms.
2. What tools do I need to remove a ceiling light fixture without screws?
You’ll need a ladder, screwdriver, pliers, wire cutters, and a non-contact voltage tester for safety.
3. What safety precautions should I take before removing a ceiling light fixture?
Turn off the power, use a voltage tester to confirm it’s off, and ensure your ladder is stable before starting the process.
4. What are the steps to remove a ceiling device without screws?
Identify the device type, remove the decorative cover, loosen mounting screws or clips, disconnect the wiring, and detach the fixture.
5. What can I do if some parts of the fixture are non-removable?
Consider covering non-removable parts with paint or decorative elements. If not possible, consult a professional to replace the ceiling box.
6. What troubleshooting tips can help during the removal process?
Apply penetrating oil for stuck screws, use a flathead screwdriver to pry loose clips, and utilize wire cutters and a stripper for tangled wires.
7. What should I keep in mind when installing a new ceiling light fixture?
Always follow the manufacturer’s instructions, secure the mounting bracket, connect the wiring properly, and ensure the fixture is securely mounted.
Conclusion
Removing a ceiling apparatus with no screws might seem daunting at first, but with the right tools, safety measures, and a bit of patience, it’s a task most homeowners can tackle.
While removing your ceiling light fixtures may seem daunting, it’s actually quite effortless with the right guidance. Once you’ve mastered this, you might want to consider innovative ways to illuminate your bedroom, such as exploring different under-bed lighting techniques to create a cozy atmosphere.
Remember, if at any point you feel uncomfortable or unsure, don’t hesitate to seek professional help.
With this guide in hand, you’re now equipped to take on this home improvement project with confidence. Happy DIY-ing!
")

