
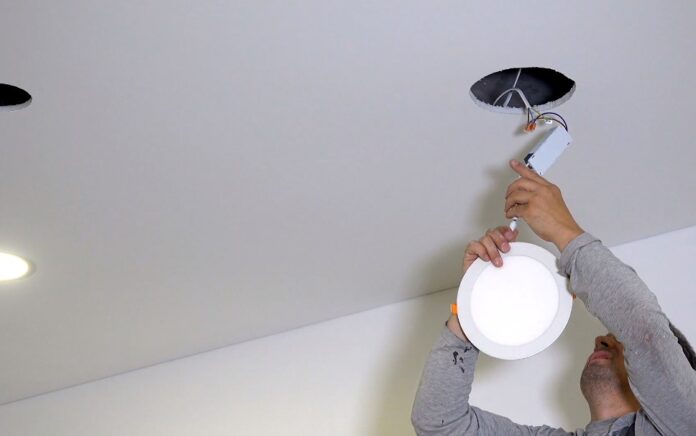
Imagine you’re embarking on a DIY project to install an LED light bar on your off-road vehicle, boat, or home. As you unbox your kit, you come across three different wire colors – white, blue, and black.
Understanding what each of these wires represents is crucial for the successful and safe installation of your beam bar.
This article will explore in detail the roles, functions, and implications of these three colors in a 3-wire LED light bar system.
The importance of understanding these line functions can’t be understated, as it significantly affects the effectiveness of your installation, your safety, and the longevity of your glowing bar.
Understanding the White Wire
The white wire plays a crucial role in ensuring your LED light bar works properly. Typically, this thread is a neutral one and forms part of the core components of your illumination system.
The white one provides a return path for the current from the light bar to the power source, creating a complete circuit that allows your LED light bar to function.
When connecting the white wire, it’s important to link it to the neutral terminal on the power source, usually marked ‘N’ or represented by the color white on the terminal.
It’s essential to connect this correctly to avoid potential electrical faults or damage to your LED light bar. Safety considerations concerning the white thread revolve primarily around ensuring that it’s connected properly to avoid electrical shocks or potential fire hazards.
Always ensure that the power source is disconnected or switched off before working with it.
Revealing the Role of the Blue One
The blue one in your 3-wire LED light bar plays an equally important role. Its function varies, but in many LED light bar systems, it’s often used as the switch coil.
This means that it carries the current from the power source to the switch, which allows you to control the system.
The blue thread connects directly to the switch component of your lighting bar system.
Misconnections involving the blue one can lead to issues such as the bar not illuminating correctly or the switch failing to function.
Decoding the Black Wire
The black cord in a 3-wire LED system is traditionally the “live” or “hot” thread.
This wire carries the electrical current from the power source to the light bar. It’s the heart of the circuit and vital for powering your LED light bar.
The black strand should be connected directly to the power source or ‘L’ terminal, usually represented by the color black.
Misunderstanding the role of this one can lead to incorrect connections, resulting in a non-functional light bar or worse, electrical shocks.
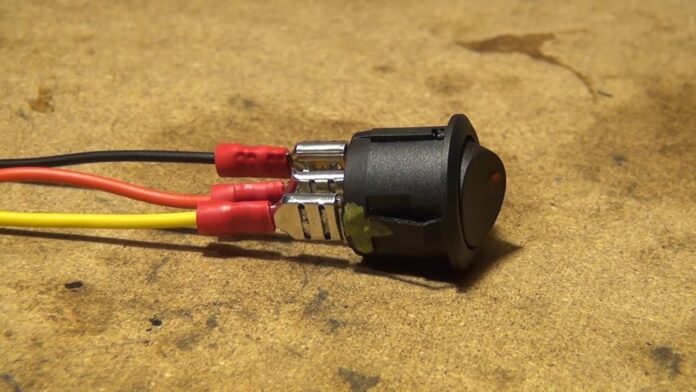
Proper Wiring Techniques for a 3-Wire LED Light Bar
Knowing how to wire these three colored threads is crucial. Begin by ensuring your power source is disconnected or switched off.
Connect the black one to the ‘L’ terminal on the power source, the white coil to the ‘N’ terminal, and the blue thread to your switch.
Use appropriate tools and materials, such as cord strippers, a screwdriver, and protective gloves.
Troubleshooting Tips and Solutions
Common problems in wiring include a non-functioning light bar, flickering lights, or the switch not working.
Try reconnecting them, ensuring they are firmly connected to the right terminals. For more complex issues, consult with a professional.
Best Practices for Wire Management
An organized thread management approach contributes to safety and enhances the aesthetic appeal of your installation.
Use zip ties, clips, or conduit to neatly secure and conceal your cables. This ensures a clean, professional-looking installation.
Safety Considerations and Precautions
Safety can never be overemphasized when dealing with electrical installations.
Always disconnect or switch off the power source before starting, use insulated tools, and wear protective gloves.
Should you encounter any challenges, don’t hesitate to seek professional assistance.
Conclusion
We’ve demystified the functions of white, blue, and black wires in a 3-wire LED light bar.
Understanding these roles can help you successfully install your product, maintain safety, and ensure the longevity of your lighting system.
Feel free to share your experiences or ask further questions. Happy wiring!
Frequently Asked Questions
What is the purpose of the white wire in a 3-wire LED light bar?
The white one serves as the neutral wire and provides a return path for the current from the illumination device to the power source, completing the circuit and allowing the LED light bar to function properly.
How should I connect the white one?
The white thread should be connected to the neutral terminal on the power source, which is typically marked ‘N’ or represented by the color white on the terminal.
Correctly connecting the white wire is essential to avoid electrical faults or damage to your LED light bar.
Are there any safety considerations regarding the white wire?
Yes, safety precautions should be taken when working with the white coil.
Always ensure that the power source is disconnected or switched off before handling the wire to avoid electrical shocks or potential fire hazards.
What is the role of the blue thread in this system?
The blue one often serves as the switch wire in many LED light bar systems.
It carries the current from the power source to the switch, allowing you to control the light bar.
How do I connect the blue one?
The blue wire should be connected directly to the switch component of your illumination system.
Properly connecting the blue coil ensures that the LED light bar illuminates correctly and the switch functions properly.
What function does the black wire have in a 3-wire LED system?
The black one is typically the “live” or “hot” wire that carries the electrical current from the power source to the light bar. It is essential for powering the LED light bar.
Where should I connect the black one?
The black thread should be connected directly to the power source or ‘L’ terminal, usually represented by the color black.
Correctly connecting the black wire ensures that the light bar receives the necessary power for operation.
What are the proper wiring techniques for a 3-wire LED light bar?
To wire a 3-wire LED light bar, first, ensure that the power source is disconnected or switched off.
Connect the black one to the ‘L’ terminal on the power source, the white thread to the ‘N’ terminal, and the blue coil to the switch.
Use appropriate tools, such as strippers and a screwdriver, and wear protective gloves.
What should I do if my 3-wire LED light bar is not functioning properly?
If your light bar is not working, try reconnecting the coils, ensuring they are firmly connected to the correct terminals.
If the issue persists, consult with a professional for more complex troubleshooting or assistance.
How can I ensure proper wire management for my LED light bar installation?
To ensure proper strand management, use zip ties, clips, or conduit to neatly secure and conceal your threads.
This not only enhances safety but also improves the overall aesthetic appearance of your installation.
What safety precautions should I take when working with a 3-wire LED light bar?
Always disconnect or switch off the power source before starting any work. Use insulated tools and wear protective gloves to minimize the risk of electrical shocks.
If you encounter challenges or feel unsure, it is recommended to seek professional assistance.
What is the significance of understanding the functions of white, blue, and black threads in a 3-wire LED light bar?
Understanding the functions of these coils is crucial for the successful installation, safe operation, and longevity of your LED light bar.
It allows you to connect the system correctly, troubleshoot issues effectively, and ensure proper safety measures are taken during the installation process.
")

