
LED light fixtures have gained immense popularity in recent years due to their energy efficiency, longevity, and versatility.
They have become the go-to choice for both residential and commercial lighting applications. However, encountering an LED light fixture that is not working can be frustrating and leave you in the dark.
In this comprehensive guide, we will explore the common reasons behind every failure in this department and provide practical solutions to fix them.
Understanding These Lights
This technology differs significantly from traditional lighting methods such as incandescent or fluorescent bulbs. LEDs (light-emitting diodes) produce light through the movement of electrons in a semiconductor material.
Understanding the components of these devices is crucial to troubleshooting and resolving issues effectively. These components include the chips, driver, heat sink, and optics.
Common Reasons for a Failure

Light-emitting diodes may stop working due to various factors. We will explore the most common issues that can cause these devices to fail. Electrical problems, component failure, and incorrect installation are among the primary culprits.
Understanding these underlying reasons will help you pinpoint the cause of the problem and take appropriate corrective measures.
Electrical Issues
Electrical problems can significantly impact the functionality of these electric devices. We will delve into potential causes such as power surges, faulty wiring, or tripped circuit breakers.
Understanding the electrical aspects of these systems will enable you to diagnose and resolve electrical issues effectively.
Component Failure

Component failure within these glares can lead to malfunctioning or non-working fixtures. We will identify the components that commonly fail in LED fixtures, such as the driver or chips.
Exploring the impact of component failure on the overall functionality of the fixture will provide valuable insights into troubleshooting and repair.
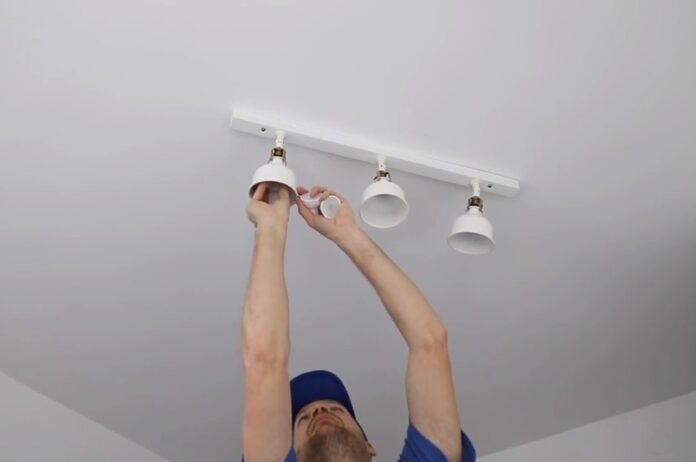
Incorrect Installation
Proper installation is crucial for the optimal performance of these glares. We will address the importance of correct installation techniques and discuss common mistakes that can result in non-functioning fixtures.
By understanding these installation pitfalls, you can ensure that your devices are installed correctly and operate seamlessly.
Troubleshooting Steps

To diagnose and resolve these issues, a systematic approach is essential. We will provide a step-by-step guide for troubleshooting non-working LED fixtures.
From checking connections to testing voltage and inspecting components, each troubleshooting step will be explained in detail.
Following these steps will help you identify the specific issue and take the necessary corrective action.
DIY Fixes for LED Issues
When faced with these issues, taking a do-it-yourself (DIY) approach can be a cost-effective and rewarding solution.
While complex electrical work is best left to professionals, there are several DIY fixes you can try to resolve common problems. Here are some DIY fixes that can help you get your devices back in working order.
Checking Connections
Start by inspecting the connections between the glares and the power source. Ensure that all wires are securely connected and that there are no loose or damaged connections. Tighten any loose screws or terminals.
Replacing the LED Driver
If your it is not working at all, the driver may be the culprit.
You can replace the light-emitting diode driver with a compatible one following the manufacturer’s instructions. Make sure to turn off the power supply before attempting any repairs.
1. Swapping LED Chips
If only a portion of your device is not illuminating, the problem may lie with the LED chips.
Some fixtures allow for individual chip replacement. Identify the faulty chip and replace it with a new one of the same specifications.
2. Inspecting the Heat Sink
Overheating can cause issues too. Check the heat sink to ensure it is clean and free from debris. If necessary, clean it gently with compressed air or a soft brush.
Ensure that the heat sink is properly mounted and has good contact with the module.
3. Resetting or Replacing Dimmer Switches
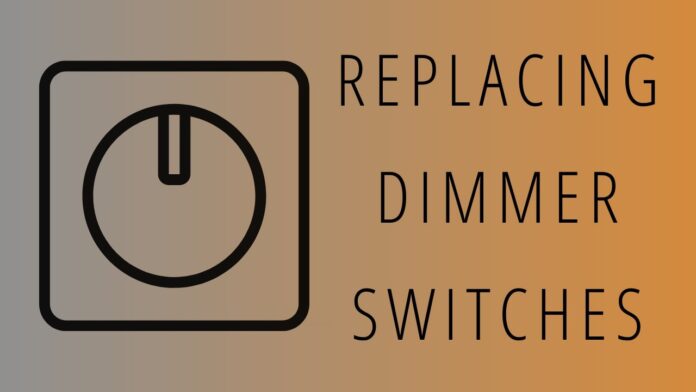
If your device flickers or does not respond properly to dimming, the dimmer switch may be the problem.
Try resetting the dimmer switch by turning it off and on. If the issue persists, consider replacing the dimmer switch with one specifically designed for light-emitting diodes.
Remember, safety should be a top priority when performing DIY fixes for the named issues.
Always turn off the power supply before working on the fixtures, and if you are unsure or uncomfortable with any aspect of the repair, it is best to consult a professional electrician.
DIY fixes can be a great way to troubleshoot and resolve minor issues with these fixtures, but it is important to know your limits and seek professional assistance for complex electrical work.
Seeking Professional Help
While DIY fixes can address many issues, there are situations where professional assistance may be necessary.
We will explain when it is appropriate to seek the expertise of an electrician or contact the manufacturer for support.
Knowing when to seek professional help will prevent further complications and ensure the safety of your lighting system.
Preventive Measures

Prevention is always better than cure. We will share preventive measures to extend the lifespan of your glares.
These measures include routine maintenance, proper cleaning techniques, and regular inspection.
By implementing these preventive measures, you can optimize the performance and longevity of your LED light fixtures.
When to Replace LED Light Fixtures
There are scenarios where replacing the LED light fixture is the best course of action.
We will discuss situations that warrant fixture replacement, such as irreparable damage, outdated technology, or a desire for more energy-efficient and reliable lighting options.
Understanding when to replace these devices will ensure you have a well-functioning and up-to-date lighting system.
Frequently Asked Questions

1. Why isn’t my device turning on?
There could be several reasons, including electrical problems, loose connections, or a faulty driver.
2. How can I determine if the driver is the problem?
You can use a multimeter to test the voltage output of the driver. If it’s not within the expected range, it may need replacement.
3. What should I do if my LED light flickers or flashes?
Flickering or flashing can indicate a loose connection, an incompatible dimmer switch, or driver compatibility issues. Check connections and consider using a compatible dimmer.
4. Why is only a portion of my LED light fixture illuminating?
This issue may stem from a problem with the LED chips or a faulty connection. Check the connections and consider replacing the affected chips.
5. Can overheating cause a malfunction?
Yes, excessive heat can affect the performance of the device. Ensure proper heat dissipation through the heat sink and avoid enclosing fixtures in tight spaces.
6. Is it possible to repair a damaged chip?
Generally, it is not practical to repair individual chips. It’s often more cost-effective to replace the entire module or fixture.
7. Can incorrect installation cause failure?
Yes, incorrect installation, such as improper wiring or inadequate ventilation, can lead to various issues. Ensure proper installation according to manufacturer guidelines.
8. How do I know if I need to replace the LED driver?
If the light fixture fails to work even after checking connections and troubleshooting, the LED driver may need replacement.
9. Are there compatibility issues between these lights and dimmer switches?
Yes, not all LED fixtures are compatible with every type of dimmer switch. Ensure the LED fixtures and dimmer switches are compatible or use dimmer switches specifically designed for this type of lighting.
10. What can I do to prevent issues in the future?
Regular maintenance, proper cleaning, and avoiding excessive heat can help prevent these issues. Follow manufacturer guidelines for care and use.
Conclusion
In conclusion, encountering a non-working device can be frustrating, but armed with knowledge and troubleshooting techniques, you can effectively address the issue.
While we’ve discussed the issues that can lead to LED light fixtures not working, it’s also important to understand the implications of continuous usage of these lights, such as whether it’s safe to keep them on throughout the night.
By understanding the common reasons for light failure and following the appropriate steps to fix them, you can enjoy the benefits of efficient and long-lasting illumination.
Remember to seek professional help when necessary and implement preventive measures to prolong the lifespan of your LED light fixtures.
Let’s shed light on the problem and brighten your spaces with functional and dazzling illumination.


